How to make a good group photo

Taking a good group photo consists of multiple aspects:

  • hardware
  • scouting
  • organization
  • preparation
  • execution
  • processing
  • publishing

I can say with confidence that nearly everything here comes from having failed to do these things right at least once, even on the latest attempts, so this is an ideal to reach towards, not something we expect to hit every time.

The Goal

The main goal of a big event group photo is capture both the moment itself and each individual person inside that moment.

We want people, who were not there to see all the people involved and get an impression of what it was like being there. It needs to show the breadth and depth of people that make up this group, this project.

And we want people who were there to be able to look back the next week, the next year or in ten years and remember - ah, yes, I was there, I was standing right there with this grin on my face next to this wonderful person and I was feeling great.

Hardware

Based on the goal we want to have high level photographic gear that is able to capture both a broad enough picture to encompass all the people and some of their surroundings to communicate the context (without undue distortions) and to deliver enough detail and resolution so that faces and facial expressions and underlying feelings of every single person in that group could be clearly seen and preserved.

To both capture the context and minimise distortion the final picture should be just a bit wider than normal human field of view. That is about 50mm for a full-frame camera or 35mm for a typical 1.6 crop camera. You can go a bit wider if there are no better alternatives (as detailed in the scouting section), but be prepared that corners of the image will be distorted and not really usable (but we can fix that in processing step). Or you can go to unusual aspect ratios, like we did in Debconf 10.

In the absence of a 100MP+ camera, you will need to be stitching together multiple frames to achieve resolution high enough to have enough pixels-per-face to see emotions clearly. This means that the photos you will actually be taking will be tighter than the overall field of view mentioned above. Still, a higher resolution camera body is preferable - nowadays 24MP-32MP cameras APS-C provide a good compromise between resolution and price, but 45-67MP full-frame cameras also exist on the market. Assume that we will be shooting in a bright environment, so most likely with quite low ISO settings, that means that high-ISO noise characteristics of more expensive cameras will not really play a role here. You will also not need very fast burst modes, even manual speed of one frame per second is sufficient.

You will also want to get as much detail as possible out of your lens, and this is the most important part. You can do amazing work in all other steps of the process and have a great camera too, but if you pair it with a lens that is not sharp, then the end result will be disappointing.

You want the lens that is sharpest corner-to-corner when stepped down to about f/8-f/11, that you can get for your system. You also want that lens to be about 85mm full-size sensor or 50mm for 1.6 crop size. Luckily that kind of range is also a great range for optical design and sharpest lenses are typically available in exactly these kinds of sizes. You absolutely want to have a fixed focal length lens, not a zoom lens. Even profession grade zoom lenses often deliver worse image quality compared to fixed lenses that cost less 1/10th of their price (when shooting in the same focal length). Newer design lenses are better than older lenses - optical design, coatings and precision manufacturing have advanced a lot over the decades. Retro look is great for mood, but not as good for actual resolution and clarity. You don't need to overpay for most expensive lenses because those often only improve image quality on lower F-stops. To encompass the whole group we will need to shoot at f/8 and in bright light, so the extra benefits of those f/1.2-capable super expensive lenses will not come into play here.

We will have no use for a flash here. A tripod will be too restrictive when rapidly repositioning the camera between different parts of the panorama shoot. But a monopod might help with stability - I have not tried that myself, however.

For my last photos I used a Canon EOS R7 (32.5MP) with Canon RF 50mm f/1.8 STM lens and considering an upgrade to Sigma 56mm f/1.4 DC DN for the next time.

Scouting

Scouting a good location for the group photo is another big chunk of a successful picture. The critical piece of the puzzle is lens-to-face distance. In order to keep everyone's face in-focus and have enough resolution on the farthest faces (without making nearest faces truly massive) we want to do everything possible to reduce the variance in lens-to-face distance - to reduce the difference in distance between closest and farthest face.

The most effective way to do that is to have the photographer climb higher. To see this in action on the Debconf photos, compare Debconf6 (very high camera position, group on level ground - good) to Debconf10 (camera not too high, group on stairs, still good) and to Debconf17 (camera could not get high enough and the group is on flat ground - not great). Even the Debconf25 photo was suboptimal from this perspective. The Debconf23 photo was a very good example from the recent years - good height and also the group was positioned in a semi-circle so there were no people directly in front and very near to the camera.

So you are looking for the highest point you could get to (even if that requires a special permission of key or a ladder) with a field large enough to fit the whole group comfortably. How to check that? Normally I simply take a photo from the top of the whole area and note down from there where the extreme corners of the group could be and still be fully seen in the shot - not blocked by trees, buildings and shadows. Then I go down and measure that space. Rule of thumb being - people in one horizontal line can stand 1 normal length step from each other and two horizontal lines can be half a step from each other vertically. So I can just measure a rough rectangle in steps, multiply the sides, multiply that by two and I have the rough number of people that can fit there for the photo.

Once you have a candidate location or two, it is important to check them at the same time-of-day as you plan to do the photo (see organization section for that). You want to make sure that the whole area of the group is in the same illumination - if half of the group is in the sun and half in a shadow, then you will be having a very bad time later. The absolute ideal positioning for the group photo is to have everyone be in shadow, but still have enough bright skies and bright buildings in front of the people to give good illumination of the faces. Worst you can do is have the sun be behind the people (so all the faces are really dark) and second worst is have the sun be directly in front of the group, so that the faces are very well illuminated, but everyone's eyes are closed because they are being blinded by the sun. And sometimes all you can do is pray for some light clouds to provide for even and dispersed light. Debconf23 was very lucky that way.

Another consideration is to how people are going to get to that place. You need to consider accessibility needs of people (it is ok, if it takes more effort or time, but it needs to be organized and communicated well in advance). And you need to consider how the big masses of people will be getting there - how to tell people where exactly it is and how to get there from various locations where people might be hanging out during the event?

Having an alternate location indoors might be necessary if the weather report for the next days is not sufficiently predictable. We had to use that contingency in Debconf9, for example.

Organization

It's hard to take a good group photo if half of the group does not show up or is too late, so this needs some organization to happen smoothly.

First of all you need to choose date and time for the photo. The photo does not take too much time from the schedule of the event and can be squeezed in after all the other events are already scheduled. In fact I prefer that as it allows you the flexibility of choosing the date based on weather conditions and time based on light and shadow conditions in potential photo spots. You don't want to choose the daytrip day as most people will be away and return times are not really predictable. You do not want to choose the morning after Cheese and Wine party for obvious reasons. First day and last two days are also sub-optimal as some people arrive late and some leave early for various personal reasons. Also you don't want it to happen just before Cheese and Wine either because then you'd have very little time and clarity to do the processing of the image on the same day.

For timing, the best way, in my experience, is to schedule the photo directly after the end of talk sessions before a meal break - lunch or dinner. Typically in the Debconf schedule there are 2-3 daily breaks planned, say for Debconf25 there was lunch, afternoon break and dinner. Talks are planned to end ~10 minutes before those breaks (and meals) begin, so for example, afternoon break starts at 16:00 and all talks in the previous block end at 15:50. In such a case just schedule the "Group photo" event from 15:50 to 16:05. This gives people the info to go there directly from the end of all talks and that they will have sufficient time for break/meal afterwards. Do not forget to specify the location (as exactly as possible) in that event entry and make sure to post it at least two days in advance. People often want to wear something specific for the photo and thus need to know about it in advance. This also makes sure that people do not make alternate food plans for that specific break and don't leave the venue.

Announce the date, time and the exact location as wide as possible, don't be shy. Announce and discuss mailing lists, IRC, Signal, Telegram, make sure the front desk knows in case anyone asks in-person, ... Check that it is again included in the announcements email on the day preceding the photo date.

When the date has arrived, it is a good idea to check in early with people with special mobility needs to make sure they know where to go, how to get there and how much time they will need to be able to get there on time.

As the final round of talks before the group photo is starting up, it is time to recruit "runners". I've had great success with this technique. The idea is pretty simple - for each room where people congregate (talk rooms, hacklabs, cafeteria, outside hackspace, front-desk, ...) go there and choose one person. You want to choose a person that you will recognise and remember among everyone else in the group, either because of who they are or what they are wearing, whatever works best for you. If they agree to help, instruct them to: "at end of talk, announce that the group photo happening now and the location, herd people towards the photo location, be the last person out, make sure there are no stragglers from this area behind you, when you arrive to the photo place I will assume that everyone else from this room is also now there, when you are there catch my attention and show this sign so I know for sure that it is all good and make sure that I did see it from you". With that sorted out all you will need to remember is how many runners you recruited and how many have reported in to figure out if everyone has now arrived or if we still have to wait for someone or some group.

Then you will only have one last point of organization left - shaping the crowd into a group. People will not know what your vision for the group photo is, so you will have to give clear and LOUD instructions on where people should not be standing. Use clear, large gestures to support your words. You want to compact the group, have the people that just joined in the last moment and are standing to the side come deeper in and join the crowd. Have any holes in the middle of the crowd filled in. Forming a semi-circle instead of a blob helps with averaging face-to-lens distances. Make sure people are not in unexpected shadows. Make sure carried objects, like umbrellas of flags do not cover the faces of other people. Take the time to look at everyone face to make sure there are no people hiding behind someone's shoulder - typically they are not aware that their face is in fact not really visible. If there are such people, call them out and point directly at them and encourage them to step forward, if they wish to do so. You are the only one seeing the final picture now and only you can correct it before capturing the moment. So a few extra seconds here are worth taking, even if 300+ people are standing in scorching heat and waiting on you.

When you are happy with what you are seeing, make sure to tell people clearly that you are now about to take the pictures and again remind them not to move and explicitly not to turn their heads to the side until you are done (this is the source of most of the extra work in processing). Be very loud and clear and make sure you have everyone's undivided attention before you start saying the important stuff.

When done - say so. There will be other groups that will want to also have a photo taken after the main group is a bit more dispersed, so don't run away. Typically at least the T-shirt group will want a picture and also all the organizers.

Final bit of organization during the group photo shooting itself is the sneaky self-insert. You may choose not to bother with it, or do it in the simplest way, like I did in Debconf6, but if you really want to blend in with the crowd, you need to have someone else take a photo of you in the exact same location at the same date and time from the same location. So you should already during shaping the crowd decide where you would fit in, it is easiest to blend in at the back of the crowd and to one or other side, so that it appears like you are just standing behind the shoulders of a couple peoples. Remember that spot - it is easiest if you stand in the exact same ground spot when your photo is taken. Just go down, recruit a volunteer to take your photo, make sure the settings are fixed to the same ones as for the group photo shots and have them take a handful of shots of you - one of you centered in the camera frame and a couple more with you more towards the corners of the frame. This distortion from being off-center in the frame may be important later.

Preparation

In addition to preparing the crowd for the photo, you also need to prepare yourself and the equipment. Make sure you have dusted your camera sensor and cleaned both inside and outside glass of your lens. It is usually a good idea to remove any filters from the lens. Install the hood, if that could help with blocking the sun flares. Make sure you have the right lens and that you have installed the right lens.

For fixed settings I typically shoot in JPEG with RAW being there more like an emergency backup. The extra dynamic range of RAW could be used, but it is really complex to do that in combination with image blending and it is hard to get right, so I prefer an all-JPEG workflow and fix the dynamic range in the scene itself, before shooting. For Canon I am using the Standard profile that boosts the color saturation and sharpness a bit as I just enjoy that look and find it hard to get anything significantly better from RAW data even with a lot of effort. In any case make sure you have enough space on the cards to take at least 100 images and that you have a full battery. Do not use high speed burst setting because it is then too easy to take too many pictures at the start of the sequence and be stuck with your camera still in "Busy" state writing big RAW files to slowish SD cards and not allowing you to finish the full picture rapidly.

You want to have the shutter speed at at least 1/100th of a second to prevent blur from both your hand movements and also from people in the shot moving around a bit (image stabilisation will not help you there). And you want to have the aperture to be around f/8 - lower apertures risk people in front or behind falling out of focus, make the lenses look less sharp. Higher apertures also start to become less sharp due to diffraction effects above f/8. ISO should stay as low as possible, ideally at ISO 100, but if there is not enough light then upping the ISO to 400 would be the first step that I would try to do and second would be decreasing the aperture to f/5.6. If there is too much light, then increasing the shutter speed should be the safe thing to do.

As people start to arrive into the shooting location - check the exposure and nail down the settings, ideally in manual mode. Consider that left side could be a bit lighter or darker than right side. Err on the side of making the picture a bit too dark as there is more depth to darkness before cut-off compared to clipping on the high end. However, do not trust the exposure detection, instead take a picture and look specifically at skin tones in faces of people that already are standing in the photo area. Faces are the key bit and the exposure needs to be adjusted just to the faces and ignore darker of lighter clothing. Do some test shots and find settings where faces look not too bright, but also not very dark and fix those settings in manual mode.

Now you are ready for the action. Shape the crowd, check the faces and the action can start!

Execution

During taking of the group photo you want to finish it fast, but at the same time you have to take the time to make it right. If you hurry too much under pressure, you risk being left with unusably blurry images and the whole effort wasted. Having already prepared and verified the manual settings makes it easier.

When you are taking pictures, you have to remain as still as possible - even at very high shutter speeds even slow hand movements are still bad for image quality. So think of the movement as of biathlon athlete shooting the very middle of five, very separate targets - take a burst, reframe, then steady up for a second and only then take the next burst. 3 frames per burst are sufficient. 90% of the time the very first photo of a burst will be best. As you move from frame to frame, aim for just a bit more than half-frame overlap. This will give the opportunity to skip frames if all is good, but also have backup coverage of every face in case of problems. Proceed systematically, I typically start off on the top left of the crowd, then go right until the end of the line, then shift down half a frame and go left until the end and repeat until I am done with the crowd.

After that it is very helpful to also immediately take photos of a "frame" around the whole crowd. Stitching process often distorts the frames in weird ways that leave holes in the resulting image that you can fill if you have a wide frame around the crowd. It is possible to compensate with creative cutouts in the final image (like Debconf9), but the more framing room you make, the more flexible you will be able to be with cropping of the final photo. The frame also gives you the opportunity to capture more of the context of the place and space.

As an example, Debconf25 group photo in the end consisted from 9 images + 1 for sick people + 1 for me. I ended up missing the framing shots for bottom left, top left and top right corners. To get there I took 68 images. And in some years it was more than a hundred.

Processing

This part might be less stressful than taking the pictures from intensity perspective, but it lasts longer. Depending on you luck, skill and perfectionism it can take anywhere from 3 to 9 hours of work to complete.

Before you start, however, you should first request things that you will need for other people. This can even be done before taking the actual group photo, but usually I forget. To finish the photo you will need three things:

  • good quality vector graphics of the current Debconf logo
  • good quality vector graphics of the next years Debconf logo (even if preliminary)
  • motto of the conference

The first two you should be able to get from the respective organizers. The motto is harder. I typically try to ask the current DPL to come up with something describing the current mood of the project or of the event, but it is rare that it is that easy. Most of the time I came up with something as I was editing the photo and reflecting on what was the mood, the feeling, the mojo of this conference and of this year was like. Bend that around a recognisable phrase or expression, make it a bit more insider-relevant and you are on the right path. Some years this was the hardest part.

For the panorama stitching I will describe the workflow that has served me good for years, but maybe there are better ways possible nowadays. Feel free to let me know!

First I would save all photos taken and select one sharpest photo from every burst. Next I would select the minimal number of photos that appear to be covering the entire crowd. The fewer images you use, the better in the end because the most quality problems crop up in the areas where photos are getting stitched together. Fewer seams leads to fewer issues.

Open Hugin (you will also need enblend and enfuse installed) and import your minimal set of images into it. Click the "Align" button and wait a while - the processor will be trying to figure out keypoints in each image and then try to match these points between the images to try to fit them all together into a single projection. To do that it will distort the images. This is the trial and error process part. You may need to add, remove or replace images to get the stitching to work or to work better. You may want to add more of the frame images to fill the ragged holes around the image.

After initial alignment, go to "Move/Drag" tab and move the image a bit up in the projected field of view and make it a bit more central visually. That will help a bit with the distortions in the near-by people and people in the corners of the image. In the "Crop" tab set the initial crop - leave it generous, you can always crop more in later steps. Do not be afraid of leaving in sizable chunks of black homes, empty skies or grass. All of that can be filled in later as well.

Go back to the "Assistant" tab and click "Create panorama". It is good enough to have JPEG output at 100% quality using exposure corrected low dynamic range output option. Make sure to check the "Keep intermediate images" option. This will not only generate the final, merged panorama, but also keep around the individual images after perspective correction and exposure blending steps. These are critical for fixing blending error in the next step.

You might need to go back a forth a few times with a different sets of source images, maybe adding some image between other two, maybe removing another to reach a better starting point. The key part to pay attention - how many ugly stitches are there in the image. Check every face, the blending algorithms do not recognise faces and sometimes try to stitch one face from two or more images creating very weird effects. They can be fixed in the next step, but it is rather hard manual work, so the fewer such faces are in the blended image, the less work you will have. In some years I've managed to find a combination where all faces were good and in other years I had to manually fix 13-15 faces.

Do not try to blend the extra pictures (like with you or with sick people) into the main panorama with Hugin - it will get very confused with the parts of the grass that it is able to see where other people were standing.

The next is the final processing in GIMP. Think of it like a large and complex project - do as much as possible in separate layers, save often.

Fixing wrongly stitched faces and also putting yourself into the photo are very similar activities in the end. Just the scale and the source differ. For yourself you just cut out yourself (upper torso is enough) from the separate photo. For corrupted face, choose one of two intermediate images that the Hugin created where the face is transformed, but not yet merged (with a different version of itself). In either case crop the photo to roughly the interesting size and put roughly in the right spot as a separate layer on top of the group photo background. Reduce the opacity of the small layer to 30-40% and zoom in to 400%. With that it is much simpler to position the layer with pixel precision. Then all you need to do is add a layer mask to this layer and paint it just right. Basically in layer mask black means transparent and white means non-transparent. So you need to just make everything that is you have white mask and everything that is not you have black mask. And smudge the border a bit with finger tool or blur to make the transition smoother. Easy to say. Hard to do. This is what takes most of the actual work hours in post-processing.

You might miss someone. I am sure Phill is just thrilled to see me in the very middle of the Debconf25 final picture .... But do try to fix them all.

Use large, sweeping geometric figures to cover up black holes, empty grass fields and other sub-optimal corner features. And then use that newly created free space to put in a large version of the logo of this years conference, decently sized motto and slightly smaller invitation to the next years conference.

Do not forget to add a copyright and license statement somewhere in the corner in smaller, but still well readable font. I am using a text like: "Photo by: Full Name, Email: fullemail@debian.org, License: GPLv2+ or CCv3-BY" This ensures that this image may be used in any press coverage (with basic attribution) and also can be included in any GPL-licensed software, if that ever comes up. The same statement is also in the metadata of the image file (see Image-Metadata-Edit metadata in GIMP) along with information that states that this is "Debian Developer Conference Group photo, City, Country, Year". Image->Image properties->Comment is another place where GIMP hides this EXIF information.

For ease of use, in addition to a full-resolution image it is also useful to make a lower resolution version that would still fit on a 4K screen at full resolution, so about 3840px wide. Some photo hosting services set other limits for image size as well, so it might be needed to scale the image down below 100Mpix to upload it to Google Photos, for example.

Publishing

So, it is finally 1AM and the group photo is ready! How do you push it out to people? Well, in all possible ways and places. Again - don't be shy, people do really want to see it.

Push it to whatever you use for your shared photos. Push it to Debconf shared git (note that this is GIT-LFS repo, make sure you know how to add content to the LFS specifically). All permanent links to that in GroupPhotosAll wiki. And then send those links to IRC, Signal, Telegram groups, debconf-announce mailing list. Publish it in your blog and push that to Debian Planet. Push it in Threads, Bluesky and Mastodon. Send an email separately to Debconf orga team. And one to Debian Publicity Team so they can put it into the Debian Home Page and push via Debian micronews accounts.

And that is about it. Now you can go back to enjoying the rest of the conference. Or running around doing other things that you think need to be done. It's up to you. You did it. This moment will remain with people for a very long time. And you helped.

Questions? Feedback? Just ask here or here.
Value of outreach and diversity to Debian

A question came up in private conversations, but the answer IMHO is useful generally, so this is a repost. The question was generally on the topic of divercity and outreach - if it does really help underpriviledged people to give them some handout and hope that that somehow turns them into priviledged people? IMHO this is an important question in current world environment in general and to Debian in particular.

IMHO It's not about making unprivileged people more privileged than current contributors or about giving some kind of handouts.

Just talking from my personal perspective, it is more about analysing where past decisions (even perfectly reasonable ones) inadvertently created biases and trying to figure out ways to balance them out over time so that we don't end up missing good contributors just because they were, for example, unlucky with the country of their birth.

A simple example - think back a couple decades - where was the best place in the world to learn how to develop free software in general and Debian in particular? Where you had the largest chances of meeting an experienced developer in person with enough free time who could show you the ropes and explain to you things that are hard to put into documentation? I'd say those would be the campuses of a bunch of technical universities in the USA, UK and the rest of Western Europe.

If you were not attending a university, you were out of luck. If you were rural in a smaller campus, you were out of luck. If you were on a different continent - guess what? Still out of luck. Even Eastern Europe - so close, and yet - out of luck.

This made perfect sense and was a perfectly reasonable way to operate back then - Western universities had the highest density of people who had both the skill and the free time to contribute to free software. It was a no-brainer to start there. It was not a mistake to do so. But it had side-effects.

I was very lucky and persistent to overcome this out-of-luck situation, despite the closest developers being 500-600 km away and across a sea and me operating on actual dial-up Internet with barely enough money for a bus ticket, never mind a sea ferry or a plane ticket. Or a laptop to take on such a plane. Thousands of others around me, including many very competent software developers, did not have that kind of luck and persistence and thus are not contributing to free software or Debian at all.

If we look back at the past, we can recognise that past decisions left whole continents and also whole classes of people that were not given the opportunity to learn how and why to contribute to free software and Debian. That is in the end a realisation that there are many fine future developers out there who we have not reached out to yet. At this point that is a great untapped source of new developers for the project. Opportunities in western universities will still be there, noone wants to or can tear them down, but they also do not really need investment of attention, time and money to keep being effective. But other places do need that investment to start being effective. To start adding new developers to the community.

Outreach to diverse communities is in our, selfish interests. Naturally we still need to figure out how much effort is actually spent on that and evaluate efficiency of different approaches. But in principle it is what we want to do.

(And also our knowledge might make their lives better, but that's a minor side effect. /s)

Questions? Feedback? Just ask here or here.
Sedan experience (BMW i5)

Two years of midsize electric sedan experience

This February (2026) marks a full 10 years since I started working for BMW, and a key employment bonus is the ability to drive a company car on special two-year leasing terms. Just before the new year 2026 started, I said goodbye to my latest company car. After driving the BMW i4, I switched to the BMW i5. In terms of power, it was a downgrade as I switched from the maximum power i4 M50 xDrive (all-wheel drive, 600 hp) to the i5 eDrive40 (rear-wheel drive, 340 hp). Did I regret that? Not for a single second! After driving 60,000 km in the last two years with the BMW i5, I was really sad to let it go -- it was the best car I have ever driven. Simple as that.

Comparing i5 sDrive40 to i4 M50 xDrive

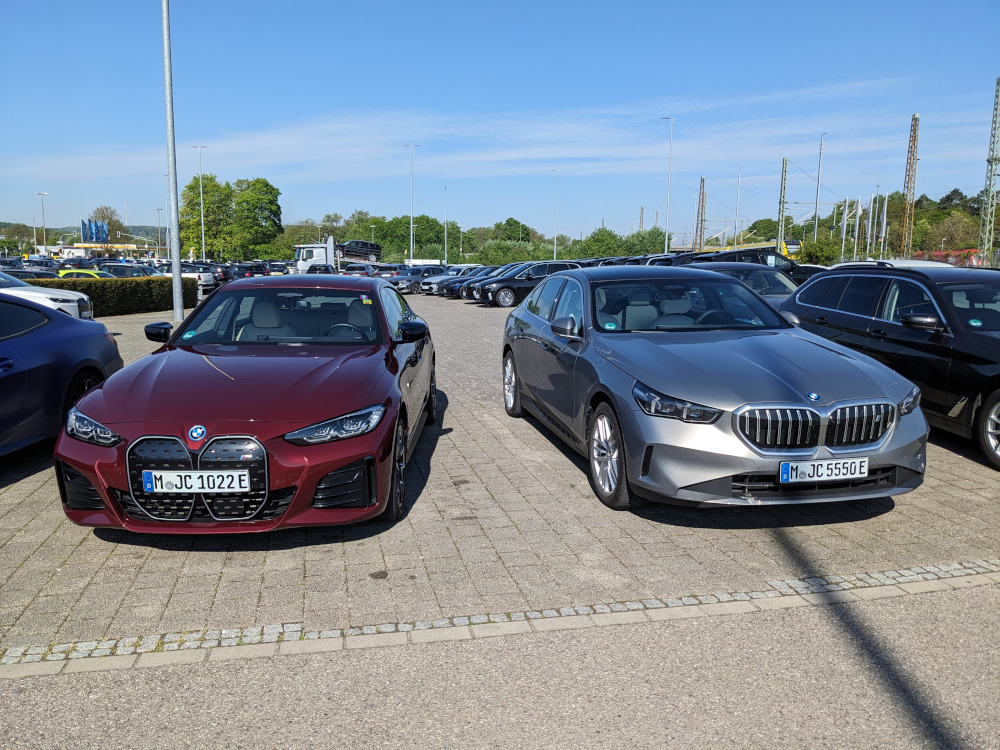
BMW i4 and i5

First, about the drivetrain. Technically, these two cars had the same generation of the BMW electrical drivetrain and very similar driving and charging characteristics. One had two electric motors (one on the rear axle and one on the front axle) and the other had just one motor on the rear axle. This also causes the difference in motor power -- basically, the power of the front motor is added on top of the power that the rear motor provides. There are motors with different power outputs, but the difference between one motor and two motors is the most pronounced.

So, is the extra money for a dual-motor version worth it in reality? I would argue that it is not. But not because it is bad. The key reason is that electric motors are so good that even just one of them is fully enough in almost all cases.

There are two situations where you'll notice a difference: very rapid acceleration (at either very low or very high speeds) and traction in very slippery situations, like driving uphill on a snow- or ice-covered road.

When accelerating, the dual-motor configurations ... just teleport to the new location and new speed. The feeling is just crazy. If you stab the accelerator pedal in such a car, you better have very good reflexes. I have out-accelerated ICE cars worth over a million euros, leaving their owners literally speechless. The single-motor version, in comparison, is "just" a very fast car. Like a Porsche. The acceleration is still very fast, but the car is not just "teleporting" and is accelerating over a time that a human brain can still comprehend. The only downside (and that is only relevant in Germany) is the top speed -- the single-motor variants are typically locked to 180-190 km/h instead of the 225-230 km/h that dual-motor variants are allowed to reach. And to be fair, BMW cars -- especially the i5 M60 -- feel extremely stable and safe at speeds over 200 km/h, so for some people in Germany, that could be a real argument for an M-Performance car. It also does not consume all that much more energy at high speeds, unlike its gasoline siblings.

When driving in a slippery situation (I have driven both in snow, ice, and mud), the dual-drive version is just magical in its ability to just keep driving without spinning the wheels in any conditions. But on all normal roads (including climbing an uphill road during a blizzard), I was also able to slowly drive forward with the single-motor i5 as well. The much better traction control that an electric motor allows makes a BEV RWD car drive almost as easily in bad road conditions as an AWD ICE car can. The key is that a BEV has maximum torque available from zero RPM. That means you do not need to press the accelerator pedal more to have enough torque to move the car up the hill and thus risk the wheels spinning out. A BEV can roll the car uphill even at the lowest speed.

Cargo area

One big difference between the i4 and i5 is the rear cargo area -- the i4 has a huge hatch opening and the whole rear window goes up. You can basically put anything in there. The i4 also does not have a fixed crossbar behind the rear seats, so with the seats down you get a fully open cargo area from the floor to the roof. Very practical. The i5, in contrast, is more conservative -- it is a classical sedan with a narrower opening. The rear window stays fixed and there is also a fixed, non-removable crossbrace and shelf behind the rear seats. On the other hand, the length of the cargo area is much deeper; you can basically fit a couple of extra crates of beer in the i5. Also, the underfloor compartment in the rear of the i5 is more usable than in the i4, as in the i4 that is also where they put the subwoofer of the high-end sound system. In the i5, it is hidden deeper in the car and does not take up any cargo space.

Seats

The rear seat of the i5 is also far more usable for adult passengers. One can go as far as to say that the rear seats in the i5 are as comfortable as normal front seats in other cars. But the i5 goes a step further as there is an option for comfort seats in the front, and I enjoyed that a lot. Three years ago, I had a very painful (but necessary) surgery on the bones in my chest. This made me much more sensitive to back, neck, and shoulder pain. In all other cars (including the i4), I was getting back pain after 3-4 hours of driving and needed to spend all the charging stops exercising during day-long drives. After we got the i5 with comfort seats, one of the first things we did was a long weekend trip from Ulm to... Barcelona. That was basically three full days of driving across a four-day period. I felt as fresh and pain-free when we came back from that trip as when we left. Sadly, there was no massage seat option for the i5 -- a rare miss, I think. But the ventilated seats were quite nice during the hot summer months.

Driving assistance

The i5 has the same kind of driving assistance as the i4 had -- rock-solid adaptive cruise control and rock-solid lane keeping. It features great adjustment of driving speed in anticipation of conditions, such as slowing down before tight corners, before intersections where navigation expects a turn to happen, and before roundabouts. It also slows down in advance of known upcoming lower speed limit signs so that the car crosses the speed limit sign line already driving the new speed limit, as required by most traffic laws. This is in contrast to other systems that only recognize the new speed limit and only start to slow down a couple of seconds after passing the speed limit sign.

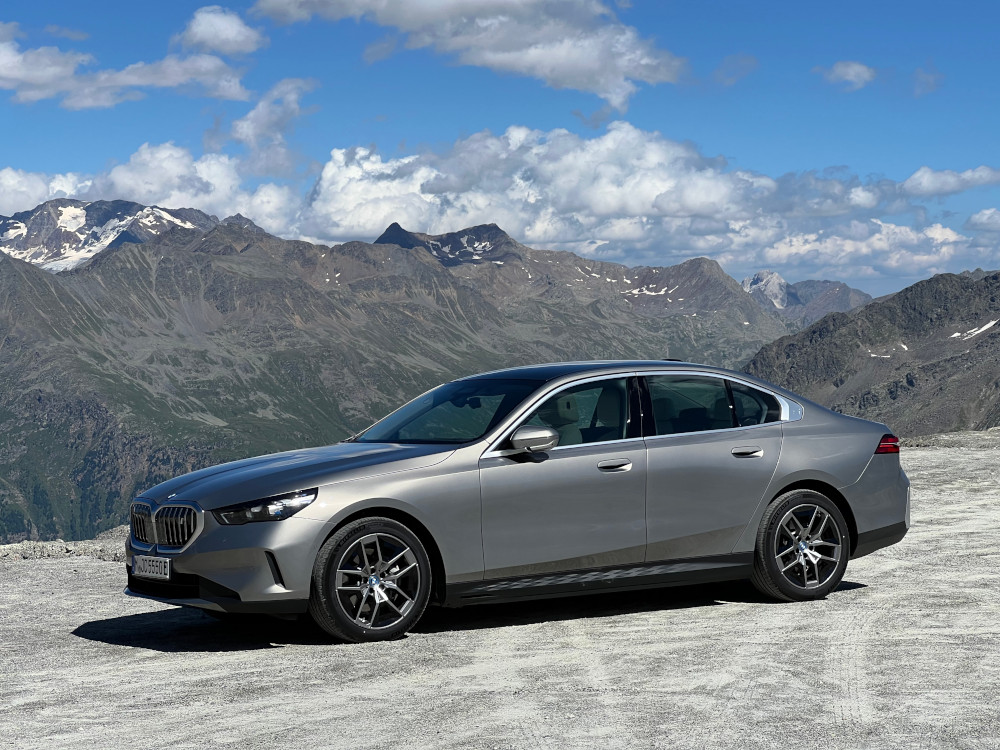
BMW i5 in mountains

Naturally, something extra was also developed in the couple of years between those models, like the Highway Assistant that allows fully legal hands-free (but still eyes-on-the-road) operation up to the legally limited 135 km/h. I initially dismissed this as a pure gimmick, but after using it on a few longer drives, I can tell that the difference in stress in my arms and shoulders is profound. Just being able to keep both arms down in my lap or on handrests does wonders for having a more relaxed driving experience. The system monitors the driver's gaze even more strictly in this mode -- you have to watch the road. As a benefit of that, the system also can detect when you are checking the side mirrors, so when the system detects that it would be beneficial to change the lane, you can confirm this lane change by simply checking the right or left side mirror. Or you can ask the car to do the lane change by activating the turn indicators. If anything, that is a great way to get BMW drivers to use those things :D

Parking assistance is also improved, including a function to park the car "remotely" by using the phone as a dead-man's switch for a pre-selected parking maneuver. This worked reliably, including underground, with zero signal. I also got a lot of use out of the pre-programmed parking routes function -- you can show the car a parking maneuver once and it will then be able to repeat it at the same location, even if the situation is a bit different every time. This works for routes up to ~40 meters long. So I can basically make a route from the entrance of the parking garage of my apartment complex all the way to my parking spot. I only need to drive it well once; after that, I can just let the car take over at any point in the path. This also works if the parking garage gets no cellular (or WiFi) signal and no GPS either. If there is a new, unavoidable obstacle in the pre-programmed way, the car will see it with ultrasonics and will just stop safely. And you can slow down or stop the automatic motion at any moment with the brake pedal.

BMW retains the concept of cooperative driver assistance here -- the car is not taking over the full driving from you; it is cooperating with you. So, for example, while driving on the highway with full cruise control and lane keeping enabled, I can still lightly tug on the steering wheel left to make the car drive in the left side of the lane instead of the middle to avoid a pothole or give a bit more distance to someone stopped on the shoulder.

Software

The BMW i5 is built on the MGU22 platform, which is an evolution of the MGU21 (and MGU18) platform that was in my previous BMW i4 car and that I described in my Debconf talk back in Montreal.

It is still based on a custom Linux build compiled with Yocto with GENIVI protocols like DLT and SomeIP connecting all the components. The UI is still running on Wayland. The screens are a bit larger than before, the resolution is higher, the responsiveness is better, and there are more apps doing different things. But as a user, it would be hard for me to find noticeable differences between these specific product generations. Part of it is on purpose -- to help users retain their user experience as they upgrade from one BMW to the next one.

Automatic migration of preferences and saved navigation locations from car to car via the BMW account login also helps that process. It can be amazing for people in corporate fleets or large (and well-off) families where one can expect to periodically drive different BMW cars (of the same model) and enjoy the seamless transfer of all their preferences (including things like seat positions) to the new car. This could have been more useful if a cross-brand standard for user in-car preferences ever existed. Maybe that will happen in the future, when cars become more of a shared commodity.

One big development that happened while I was using the i5, which also applies to all other BMW cars, is the rapid and impressive development of the MyBMW app. The team behind that has been doing great work over the past couple of years and delivered a lot of features and enhancements to user experience. For example, the automatic suggestion of destinations based on the location of events in your calendar happens (if you opt-in to this) via the MyBMW app.

Another thing that often stays unremarked is that BMW is managing the largest fleet of cars with automatic, remote software update capability in the world. ALL of the BMW models have this capability (not just BEVs) and BMW has been manufacturing ~2.5 million such cars every year since about 2018. The total remote software update capable fleet is more than twice as large as that of Tesla, for example. And it is also more complex as it has to update software on nearly 60 different models across nearly all countries in the world. This system does not just update the infotainment ECU in the car -- it updates ALL the ECUs in the car (if needed). And that is also a huge and very challenging task. The fact that it just works, with failures measured in single digits per millions of updates (mostly related to damaged hardware), is remarkable, but often stays unremarked.

Charging

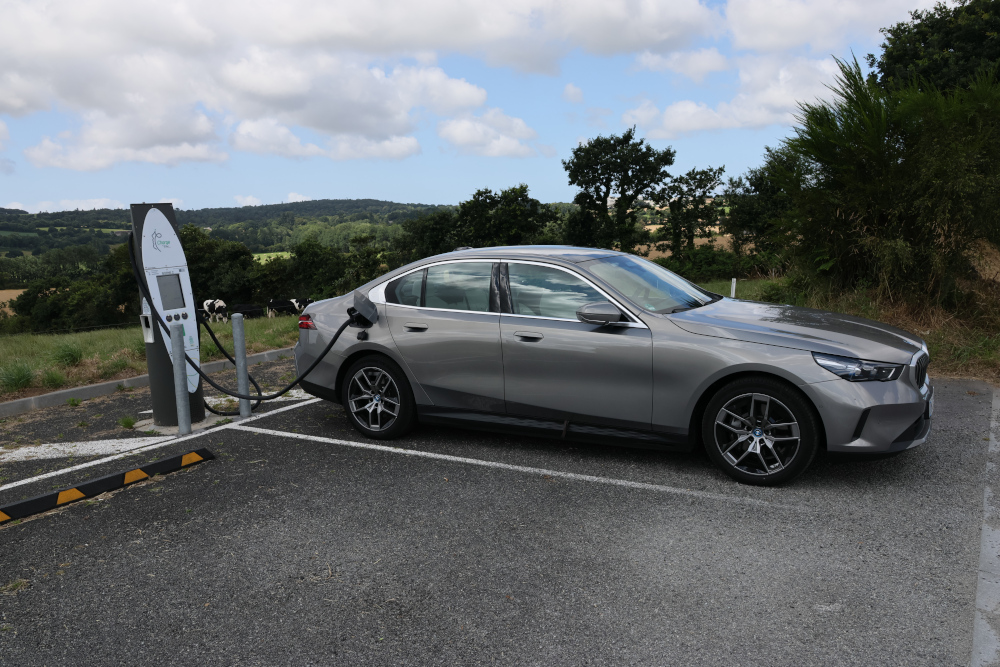
Basically, everything that I said about the i4 before also applies to the i5. The charging is a bit better -- the charging curve is flatter, so it matters even less to "manage" the charging perfectly. The consumption is a bit better -- likely due to the single-motor configuration. High-speed consumption is astonishingly good -- I was routinely cruising long distances at 190 km/h and never had a feeling that this high speed impacted my range much.

BMW Charging

In the end, I don't even talk about charging speeds or consumption anymore. Instead, in real life, I think about charging and consumption in terms of time, and then it sounds like this:

  • In Germany (speeds around 180 km/h): from full charge, drive ~3 hours, charge for 20 minutes, drive another ~2 hours
  • On highways outside Germany (~140 km/h): from full charge, drive ~4 hours, charge for 20 minutes, drive another ~3 hours
  • On regional roads (90–100 km/h): from full charge, drive ~6 hours, charge for 15 minutes, and drive another ~4 hours

All I do normally is:

  • On any longer drive, just enter all destinations for today into the BMW navigation system, then it will automatically plan for the best charging location. If at the end of the day I will not get to a place with an overnight charger and I will need to keep driving further, then I also add tomorrow's first stop into the navigation.
  • In everyday usage, I simply prefer to park in locations that have a charger (any charger).

If I go downtown to a cinema, there is a parking garage there that has 11 kW chargers that will pump 20–30% of battery capacity into the car while I am watching the movie. If I go shopping, I choose a shop that has a 50–150 kW charger nearby -- then in the half an hour that I usually spend in the shop, the car will usually be up to 80–90% capacity. Even going to a shopping mall that has 11 kW chargers is worth it. Even if I just charge up 10% of the battery while in the shop, I still get home with more battery than I left with. This way, even without a charger at home, I can easily maintain or increase the charge level of my car's battery without having to explicitly go somewhere just to charge.

Charging works best when it happens incidentally -- where and when your car is parked anyway.

I hope to get a charging station at home this year; then I will only be charging outside of the home when I drive more than ~4 hours on the Autobahn on the same day. Just driving from Ulm to Munich and back would then not be enough to make me have to charge outside of home.

There is a negative nuance in charging an electric car in Europe, and Germany specifically. The costs have increased a lot and flexibility has decreased a lot in the past few years. The cost of electricity shot up a lot after the attack on Ukraine started, and the cost of public charging soon followed. And while the retail electricity cost has decreased again, the cost of charging is still high. Especially for corporate roaming cards that company car users are using. It is not unusual to see costs of 1 €/kWh and blocking fees of 17 €/hour after as little as 30 minutes from the start of charging. The EU needs to pay more attention to this as such costs are a real blocker for electromobility. Luckily, it is still quite easy to find chargers costing as little as 0.35–0.49 €/kWh and having much more reasonable blocking fees that only start after 1 hour on fast chargers and 4 hours (during the day) on slow chargers.

What's next?

So my BMW i5 is back in the dealership, so what is next for me? Unusually, I will be spending the next few months without a car and reliant on the great public transport and the amazing Deutschlandticket that, for a low price (just over 40 €/month after employer discount), gives me access to all regional and city public transport across the entire Germany. It does not include long-distance high-speed trains (like ICE), but all local transport is there. And that will also save me some money on the taxable benefit side as well from not having a company car.

I would not do that voluntarily, so why? Well, I am waiting for the new car -- the BMW iX3 Neue Klasse.

This is going to be the first car on the Neue Klasse platform, also known as the Service Pack 25 architecture. The previous cars were on the SP21 architecture. This is going to be a BIG deal. In this generation, everything is new and redesigned from scratch. The whole concept of what a car is and what a BMW is was recreated from a blank slate. And all of that was done with BEV design as basically the only design choice. The NK design can include range-extending gasoline or hydrogen engines, but the main driving force in NK always is the big battery and the strong electrical motor. Or two. Or three. Or four.

It is a whole new world, let me tell you. This car, compared to all previous BMW cars, feels like a generation was skipped. It is two generations ahead of everything BMW has done before. In electromobility, in what a car is, in traction and stability, in software, in user experience. I've been working on this for, basically, the last 5 years. A lot has been invested into this.

And it is not just one car. All BMW cars in the future will transition to Neue Klasse designs. This is a clean, architectural break. This is what "a BMW" will mean for the next decades. It is really hard to overstate the importance of this particular car model. And that is why I am happy to wait a few months without a car for it. I am hoping for delivery in April, but demand is so high that I am not certain when I'll get it, even if I ordered the car the very first day that a configurator was available. The whole planned production capacity for Europe for 2026 is supposedly already sold out.

What can I tell about the software there? Not much more than is already published. It is still a Linux-based operating system, but now you will notice that it is also based on Android, specifically on the AOSP software stack. It still remains a 100% in-house developed OS and software stack with full control over all integrations. As shown just last week at CES, there is a local LLM for an in-car voice assistant and an integration to off-car Alexa+ expansion to cover wider services, like rich location search and hands-free booking of a table at a restaurant, for example. Naturally, each part of these services needs to meet strict privacy requirements, and the user needs to be able to agree or disagree to use them. And all of that needs to be tested.

I hope that I can talk a bit more about this in one of the future Debconfs again.

Questions? Feedback? Just ask here or here.
Snapshot mirroring in Debian (and Ubuntu)

Snapshot mirroring in Debian (and Ubuntu)

The use of snapshots has been routine in both Debian and Ubuntu for several years now—or more than 15 years for Debian, to be precise. Snapshots have become not only very reliable, but also an increasingly important part of the Debian package archive.

This week, I encountered a problem at work that could be perfectly solved by correctly using the Snapshot service. However, while trying to figure it out, I ran into some shortcomings in the documentation. Until the docs are updated, I am publishing this blog post to make this information easier to find.

Problem 1: Ensure fully reproducible creation of Docker containers with the exact same packages installed, even years after the original images were generated.

Solution 1: Pin everything! Use a pinned source image in the FROM statement, such as debian:trixie-20250721-slim, and also pin the APT package sources to the "same" date - "20250722".

Hint: The APT packages need to be newer than the Docker image base. If the APT packages are a bit newer, that's not a problem, as APT can upgrade packages without issues. However, if your Docker image has a newer package than your APT package sources, you will have a big problem. For example, if you have "libbearssl0" version 0.6-2 installed in the Docker image, but your package sources only have the older version 0.6-1, you will fail when trying to install the "libbearssl-dev" package. This is because you only have version 0.6-1 of the "-dev" package available, which hard-depends on exactly version 0.6-1 of "libbearssl0", and APT will refuse to downgrade an already installed package to satisfy that dependency.

Problem 2: You are using a lot of images in a lot of executions and building tens of thousands of images per day. It would be a bad idea to put all this load on public Debian servers. Using local sources is also faster and adds extra security.

Solution 2: Use local (transparently caching) mirrors for both the Docker Hub repository and the APT package source.

At this point, I ran into another issue—I could not easily figure out how to specify a local mirror for the snapshot part of the archive service.

First of all, snapshot support in both Ubuntu and Debian accepts both syntaxes described in the Debian and Ubuntu documentation above. The documentation on both sites presents different approaches and syntax examples, but both work.

The best approach nowadays is to use the "deb822" sources syntax. Remove /etc/apt/sources.list (if it still exists), delete all contents of the /etc/apt/sources.list.d directory, and instead create this file at /etc/apt/sources.list.d/debian.sources:

Types: deb
URIs: https://common.mirror-proxy.local/ftp.debian.org/debian/
Suites: trixie
Components: main non-free-firmware non-free contrib
Signed-By: /usr/share/keyrings/debian-archive-keyring.gpg
Snapshot: 20250722

Hint: This assumes you have a mirror service running at common.mirror-proxy.local that proxies requests (with caching) to whitelisted domains, based on the name of the first folder in the path.

If you now run sudo apt update --print-uris, you will see that your configuration accesses your mirror, but does not actually use the snapshot.

Next, add the following to /etc/apt/apt.conf.d/80snapshots:

APT::Snapshot "20250722";

That should work, right? Let's try sudo apt update --print-uris again. I've got good news and bad news! The good news is that we are now actually using the snapshot we specified (twice). The bad news is that we are completely ignoring the mirror and going directly to snapshots.debian.org instead.

Finding the right information was a bit of a challenge, but after a few tries, this worked: to specify a custom local mirror of the Debian (or Ubuntu) snapshot service, simply add the following line to the same file, /etc/apt/apt.conf.d/80snapshots:

Acquire::Snapshots::URI::Override::Origin::debian "https://common.mirror-proxy.local/snapshot.debian.org/archive/debian/@SNAPSHOTID@/";

Now, if you check again with sudo apt update --print-uris, you will see that the requests go to your mirror and include the specified snapshot identifier. Success!

Now you can install any packages you want, and everything will be completely local and fully reproducible, even years later!

Debconf 25 photos

Debconf 25 photos

Debconf 25 came to the end in Brest, France this year a couple weeks ago.

This has been a very different and unusually interesting Debconf. For me it was for two, related reasons: for one the conference was close enough in Western Europe that I could simply drive there with a car (which reminds me that I should make a blog post about the BMW i5, before I am done with it at the end of this year) and for the other - the conference is close enough to Western Europe that many other Debian developers could join this year who have not been seen at the event for many years. Being able to arrive early, decompress and spend extra time looking around the place made the event itself even more enjoyable than usual.

The French cuisine, especially in its Breton expression, has been a very welcome treat. Even if there were some rough patches with the food selection, amount, or waiting, it was still a great experience.

I specifically want to say a big thank you to the organisers for everything, but very explicitly for planning all the talk/BOF rooms in the same building and almost on the same floor. It saved me a lot of footwork, but also for other participants the short walks between the talks made it possible to always have a few minutes to talk to people or grab a croissant before running to the next talk.

IMHO we should come back to a tradition of organising Debconf in Europe every 2-3 years. This maximises one of the main goals of Debconf - bringing as many Debian Developers as possible together in one physical location. This works best when the location is actually close to large concentrations of existing developers. In other years, the other goal of Debconf can then take priority - recruiting new developers in new locations. However, these goals could both be achieved at the same time - there are plenty of locations in Europe and even in Western Europe that still have good potential for attracting new developers. Especially if we focus on organising the event on the campuses of some larger technically-oriented universities.

This year was also very productive for me—a lot of conversations with various people about all kinds of topics, especially technical packaging questions. It has been a long time since the very basic foundations of Debian packaging work have been so fundamentally refactored and modernized as in the past year. Tag2upload has become a catalyst for git-based packaging and for automated workflows via Salsa, and all of that feeds back into focusing on a few best-supported packaging workflows. There is still a bit of a documentation gap of a new contributor getting to these modern packaging workflows from the point where the New Maintainers Guide stops.

In any case, next year Debconf will be happening in Santa Fe, Argentina. And the year after that it is all still open and in a close competition between Japan, Spain, Portugal, Brazil and .. El Salvador? Personally, I would love to travel to Japan (again), but Spain or Portugal would also be great locations to meet more European developers again.

As for Santa Fe ... it is quite likely that I will not be able to make it there next year, for (planned) health reasons. I guess I should also write a new blog post about what it means to be a Debconf Photographer, so that someone else could do this as well, and also reduce the "bus factor" along the way.

But before that - here is the main group photo from this year:

DebConf 25 Group photo

You can also see it on:

You can also enjoy the rest of the photos:

Additionally, check out photos from other people on GIT LFS and consider adding your own photos there as well.

Other places I have updated with up-to-date information are these wiki pages:

If you took part in the playing cards event, then check your photo in this folder and link to your favourite from your line in the playing card wiki

Debconf 24 photos

Debconf 24 is coming to a close in Busan, South Korea this year.

I thought that last year in India was hot. This year somehow managed to beat that. With 35C and high humidity the 55 km that I managed to walk between the two conference buildings have really put the pressure on. Thankfully the air conditioning in the talk rooms has been great and fresh water has been plentiful. And the korean food has been excellent and very energetic.

Today I will share with you the main group photo:

DebConf 24 Group photo

You can also see it in:

The rest of my photos from the event will be published next week. That will give me a bit more time to process them correctly and also give all of you a chance to see these pictures with fresh eyes and stir up new memories from the event.

Figuring out finances part 5

At the end of the last part of this, we got a Home Assistant OS installation that contains in itself a Firefly III instance and that contains all the current financial information. They are communicating and calculating predictions for me.

The only part that I was not 100% happy with was accounting of cash transactions. You see payments in cash are mostly made away from computer and sometimes even in areas without a mobile Internet connection. And all Firefly III apps that I tried failed at the task of creating a new transaction when offline. Even the one recommended Telegram bot from Firefly III page used a dialog-based approach for creating even a simplest transaction. Issue asking for a one-shot transaction creation option stands as unresolved.

Theoretically it would have been best if I could simply contribute that feature to that particular Telegram bot ... but it's written in Javascript. By mapping the API onto tasks somehow. After about 4 hours I still could not figure out where in the code anything actually happens. It all looked like just sugar or spagetty. Connectors on connectors on mappers.

So I did the real open-source thing and just wrote my own tool. firefly3_telegram_oneshot is a maximally simple Telegram bot based on python-telegram-bot library.

So what does it do? The primary usage for me is to simply send a message to the bot at any time with text like "23.2 coffee and cake" and when the message eventually reaches the bot, it then should create a new transaction from my "cash" account to "Unknown" account in amount of 23.20€ and description "coffee and cake".

That is the key. Everything else in the bot is comfort.

For example "/undo" command deletes the last transaction in cash account (presumably added by error) and "/last" shows which transaction the "/undo" would delete.

And to help with expense categorisation one can also do a message like "6.1 beer, dest=Edeka, cat=alcohol" that would search for a destination account that would fuzzy match to "Edeka" (a supermarket in Germany) and add the transation to the category fuzzy matched to "alcohol", like "Shopping - alcoholic drinks".

And to make that fuzzy matching more reliable I also added "/cat something" and "/dest something" commands that would show which category or destination account would be matched with a given string.

All of that in around 250 lines of Python code and executed by a 17 line Dockerfile (via the Portainer on my Home Assistant OS). One remaining function that could be nice is creating a category or destination account on request (for example when the first character of the supplied string is "+").

I am really plesantly surprised about how much can be done with how little code using the above Python library. And you never need to have any open incoming ports anywhere to runs such bots, so the attack surface for such bot-based service is much tighter.

All in all the system works and works well. The only exception is that for my particual bank there is still no automatic way of extracting data about credit card transactions. For those I still have to manually log into the Internet bank, export a CSV file and then feed that into the Firefly III importer. Annoying. And I am not really motivated to try to hack my bank :D

Has this been useful to any of you? Any ideas to expand or improve what I have? Just find me as "aigarius" on any social media and speak up :)

Figuring out finances part 4

At the end of the last part of this, we got a Home Assistant OS installation that contains in itself a Firefly III instance and that contains all the current financial information. Now I will try to connect the two.

While it could be nice to create a fully-featured integration for Firefly III to Home Assistant to communicate all interesting values and events, I have an interest on programming a more advanced data point calculation for my budget needs, so a less generic, but more flexible approch is a better one for me. So I was quite interested when among the addons in the Home Assistant Addon Store I saw AppDaemon - a way to simply integrate arbitrary Python processing with Home Assistant. Let's see if that can do what I want.

For start, after reading the tutorial , I wanted to create a simple script that would use Firefly III REST API to read the current balance of my main account and then send that to Home Assistant as a sensor value, which then can be displayed on a dashboard.

As a quick try I modified the provided hello_world.py that is included in the default AppDaemon installation:

import requests
from datetime import datetime
import appdaemon.plugins.hass.hassapi as hass
app_token = "<FIREFLY_PERSONAL_ACCESS_TOKEN>"
firefly_url = "<FIREFLY_URL>"

class HelloWorld(hass.Hass):
    def initialize(self):
        self.run_every(self.set_asset, "now", 60 * 60)

    def set_asset(self, kwargs):
        ent = self.get_entity("sensor.firefly3_asset_sparkasse_main")
        if not ent.exists():
            ent.add(
                state=0.0,
                attributes={
                    "native_value": 0.0,
                    "native_unit_of_measurement": "EUR",
                    "state_class": "measurement",
                    "device_class": "monetary",
                    "current_balance_date": datetime.now(),
                })

        r = requests.get(
            firefly_url + "/api/v1/accounts?type=asset",
            headers={
                "Authorization": "Bearer " + app_token,
                "Accept": "application/vnd.api+json",
                "Content-Type": "application/json",
        })
        data = r.json()
        for account in data["data"]:
            if not "attributes" in account or "name" not in account["attributes"]:
                continue
            if account["attributes"]["name"] != "Sparkasse giro":
                continue
            self.log("Account :" + str(account["attributes"]))
            ent.set_state(
                state=account["attributes"]["current_balance"],
                attributes={
                    "native_value": account["attributes"]["current_balance"],
                    "current_balance_date": datetime.fromisoformat(account["attributes"]["current_balance_date"]),
                })
            self.log("Entity updated")

It uses a URL and personal access token to access Firefly III API, gets the asset accounts information, then extracts info about current balance and balance date of my main account and then creates and/or updates a "sensor" value into Home Assistant. This sensor is with metadata marked as a monetary value and as a measurement. This makes Home Assistant track this value in the database as a graphable changing value.

I modified the file using the File Editor addon to edit the /config/appdaemon/apps/hello.py file. Each time the file is saved it is reloaded and logs can be seen in the AppDaemon Logs section - main_log for logging messages or error_log if there is a crash. Useful to know that requests library is included, but it hard to see in the docks what else is included or if there is an easy way to install extra Python packages.

This is already a very nice basis for custom value insertion into Home Assistant - whatever you can with a Python script extract or calculate, you can also inject into Home Assistant. With even this simple approach you can monitor balances, budgets, piggy-banks, bill payment status and even sum of transactions in particular catories in a particular time window. Especially interesting data can be found in the insight section of the Firefly III API.

The script above uses a trigger like self.run_every(self.set_asset, "now", 60 * 60) to simply run once per hour. The data in Firefly will not be updated too often anyway, at least not until we figure out how to make bank connection run automatically without user interaction and not screw up already existing transactions along the way. In theory a webhook API of the Firefly III could be used to trigger the data update instantly when any transaction is created or updated. Possibly even using Home Assistant webhook integration. Hmmm. Maybe.

Who am I kiddind? I am going to make that work, for sure! :D But first - how about figuring out the future?

So what I want to do? In short, I want to predict what will be the balance on my main account just before the next months salary comes in. To do this I would:

  • take the current balance of the main account
  • if this months salary is not paid out yet, then add that into the balance
  • deduct all still unpaid bills that are due between now and the target date
  • if the credit card account has not yet been reset to the main account, deduct current amount on the cards
  • if credit card account has been reset, but not from main account deducted yet, deduct the reset amount

To do that I need to use the Firefly API to read: current account info, status of all bills including next due date and amount, transfer transactions between credit cards and main account and something that would store the expected salary date and amount. Ideally I'd use a recurring transaction or a income bill for this, but Firefly is not really cooperating with that. The easiest would be just to hardcode that in the script itself.

And this is what I have come up with so far.

To make the development process easier, I separated put the params for the API key and salary info and app params for the month to predict for, and predict both this and next months balances at the same time. I edited the script locally with Neovim and also ran it locally with a few mocks, uploading to Home Assistant via the SSH addon when the local executions looked good.

So what's next? Well, need to somewhat automate the sync with the bank (if at all possible). And for sure take a regular database and config backup :D

Figuring out finances part 3

So now that I have something that looks very much like a budgeting setup going, I am going to .. delete it! Why? Well, at the end of the last part of this, the Firefly III instance was running on a tiny Debian server in a Docker container right next to another Docker container that is running the main user of this server - a Home Assistant instance that has been managing my home for several years already. So why change that?

See, there is one bit of knowledge that is very crucial to your Home Assistant experience, which is not really emphasised enough in the Home Assistant documentation. In fact back when I was getting into the Home Assistant both the main documentation and basically all the guides around were just coming off the hype of Docker disrupting everything and that is a big reason why everyone suggested to install and use Home Assistant as a Docker container on top of any kind of stable OS. In fact I used to run it for years on my TerraMaster NAS, just so that I don't have a separate home server running 24/7 at home and just have everything inside the very compact NAS case.

So here is the thing you NEED to know - Home Assistant Container is DEMO version of Home Assistant! If you want to have a full Home Assistant experience and use the knowledge of the huge community around the HA space, you have to use the Home Assistant OS. Ideally on dedicated hardware. Ideally on HA Green box, but any tiny PC would also work great. Raspberry Pi 4+ is common, but quite weak as the network size grows and especially the SD card for storage gets old very fast. Get a real small x86 PC with at least 4Gb RAM and a NVME SSD (eMMC is fine too). You want to have an Ethernet port and a few free USB ports. I would also suggest immediately getting HA SkyConnect adapter that can do Zigbee networking and will do Matter soon (tm). I am making do with a SonOff Zigbee gateway, but it is quite hacky to get working and your whole Zigbee communication breaks down if the WiFi goes down - suboptimal.

So I took a backup of the Home Assistant instance using it's build-in tools. I took an export of my fully configured Firefly III instance and proceeded to wipe the drive of the NUC. That was not a smart idea. :D

On the Home Assitant side I was really frustrated by the documentation that was really focused on users that are (likely) using Windows and are using an SD card in something like Raspberry Pi to get Home Assistant OS running. It recommended downloading Etcher to write the image to the boot medium. That is a really weird piece of software that managed to actually crash consistently when I was trying to run it from Debian Live or Ubuntu Live on my NUC. It took me way too long to give up and try something much simpler - dd.

xzcat haos_generic-x86-64-11.0.img.xz | dd of=/dev/mmcblk0 bs=1M

That just worked, prefectly and really fast. If you want to use a GUI in a live environment, then just using the gnome-disk-utility ("Disks" in Gnome menu) and using the "Restore Disk Image ..." on a partition would work just as well. It even supports decompressing the XZ images directly while writing.

But that image is small, will it not have a ton of unused disk space behind the fixed install partition? Yes, it will ... until first boot. The HA OS takes over the empty space after its install partition on the first boot-up and just grows its main partition to take up all the remaining space. Smart. After first boot is completed, the first boot wizard can be accessed via your web browser and one of the prominent buttons there is restoring from backup. So you just give it the backup file and wait. Sadly the restore does not actually give any kind of progress, so your only way to figure out when it is done is opening the same web adress in another browser tab and refresh periodically - after restoring from backup it just boots into the same config at it had before - all the settings, all the devices, all the history is preserved. Even authentification tokens are preserved so if yu had a Home Assitant Mobile installed on your phone (both for remote access and to send location info and phone state, like charging, to HA to trigger automations) then it will just suddenly start working again without further actions needed from your side. That is an almost perfect backup/restore experience.

The first thing you get for using the OS version of HA is easy automatic update that also automatically takes a backup before upgrade, so if anything breaks you can roll back with one click. There is also a command-line tool that allows to upgrade, but also downgrade ha-core and other modules. I had to use it today as HA version 23.10.4 actually broke support for the Sonoff bridge that I am using to control Zigbee devices, which are like 90% of all smart devices in my home. Really helpful stuff, but not a must have.

What is a must have and that you can (really) only get with Home Assistant Operating System are Addons. Some addons are just normal servers you can run alongside HA on the same HA OS server, like MariaDB or Plex or a file server. That is not the most important bit, but even there the software comes pre-configured to use in a home server configuration and has a very simple config UI to pre-configure key settings, like users, passwords and database accesses for MariaDB - you can litereally in a few clicks and few strings make serveral users each with its own access to its own database. Couple more clicks and the DB is running and will be kept restarted in case of failures.

But the real gems in the Home Assistant Addon Store are modules that extend Home Assitant core functionality in way that would be really hard or near impossible to configure in Home Assitant Container manually, especially because no documentation has ever existed for such manual config - everyone just tells you to install the addon from HA Addon store or from HACS. Or you can read the addon metadata in various repos and figure out what containers it actually runs with what settings and configs and what hooks it puts into the HA Core to make them cooperate. And then do it all over again when a new version breaks everything 6 months later when you have already forgotten everything. In the Addons that show up immediately after installation are addons to install the new Matter server, a MariaDB and MQTT server (that other addons can use for data storage and message exchange), Z-Wave support and ESPHome integration and very handy File manager that includes editors to edit Home Assitant configs directly in brower and SSH/Terminal addon that boht allows SSH connection and also a web based terminal that gives access to the OS itself and also to a comand line interface, for example, to do package downgrades if needed or see detailed logs. And also there is where you can get the features that are the focus this year for HA developers - voice enablers.

However that is only a beginning. Like in Debian you can add additional repositories to expand your list of available addons. Unlike Debian most of the amazing software that is available for Home Assistant is outside the main, official addon store. For now I have added the most popular addon repository - HACS (Home Assistant Community Store) and repository maintained by Alexbelgium. The first includes things like NodeRED (a workflow based automation programming UI), Tailscale/Wirescale for VPN servers, motionEye for CCTV control, Plex for home streaming. HACS also includes a lot of HA UI enhacement modules, like themes, custom UI control panels like Mushroom or mini-graph-card and integrations that provide more advanced functions, but also require more knowledge to use, like Local Tuya - that is harder to set up, but allows fully local control of (normally) cloud-based devices. And it has AppDaemon - basically a Python based automation framework where you put in Python scrips that get run in a special environment where they get fed events from Home Assistant and can trigger back events that can control everything HA can and also do anything Python can do. This I will need to explore later.

And the repository by Alex includes the thing that is actually the focus of this blog post (I know :D) - Firefly III addon and Firefly Importer addon that you can then add to your Home Assistant OS with a few clicks. It also has all kinds of addons for NAS management, photo/video server, book servers and Portainer that lets us setup and run any Docker container inside the HA OS structure. HA OS will detect this and warn you about unsupported processes running on your HA OS instance (nice security feature!), but you can just dismiss that. This will be very helpful very soon.

This whole environment of OS and containers and apps really made me think - what was missing in Debian that made the talented developers behind all of that to spend the immense time and effor to setup a completely new OS and app infrastructure and develop a completel paraller developer community for Home Assistant apps, interfaces and configurations. Is there anything that can still be done to make HA community and the general open source and Debian community closer together? HA devs are not doing anything wrong: they are using the best open source can provide, they bring it to people whould could not install and use it otherwise, they are contributing fixes and improvements as well. But there must be some way to do this better, together.

So I installed MariaDB, create a user and database for Firefly. I installed Firefly III and configured it to use the MariaDB with the web config UI. When I went into the Firefly III web UI I was confronted with the normal wizard to setup a new instance. And no reference to any backup restore. Hmm, ok. Maybe that goes via the Importer? So I make an access token again, configured the Importer to use that, configured the Nordlinger bank connection settings. Then I tried to import the export that I downloaded from Firefly III before. The importer did not auto-recognose the format. Turns out it is just a list of transactions ... It can only be barely useful if you first manually create all the asset accounts with the same names as before and even then you'll again have to deal with resolving the problem of transfers showing up twice. And all of your categories (that have not been used yet) are gone, your automation rules and bills are gone, your budgets and piggy banks are gone. Boooo. It will be easier for me to recreate my account data from bank exports again than to resolve data in that transaction export.

Turns out that Firefly III documenation explicitly recommends making a mysqldump of your own and not rely on anything in the app itself for backup purposes. Kind of sad this was not mentioned in the export page that sure looked a lot like a backup :D

After doing all that work all over again I needed to make something new not to feel like I wasted days of work for no real gain. So I started solving a problem I had for a while already - how do I add cash transations to the system when I am out of the house with just my phone in the hand? So far my workaround has been just sending myself messages in WhatsApp with the amount and description of any cash expenses. Two solutions are possible: app and bot.

There are actually multiple Android-based phone apps that work with Firefly III API to do full financial management from the phone. However, after trying it out, that is not what I will be using most of the time. First of all this requires your Firefly III instance to be accessible from the Internet. Either via direct API access using some port forwarding and secured with HTTPS and good access tokens, or via a VPN server redirect that is installed on both HA and your phone. Tailscale was really easy to get working. But the power has its drawbacks - adding a new cash transaction requires opening the app, choosing new transaction view, entering descriptio, amount, choosing "Cash" as source account and optionally choosing destination expense account, choosing category and budget and then submitting the form to the server. Sadly none of that really works if you have no Internet or bad Internet at the place where you are using cash. And it's just too many steps. Annoying.

An easier alternative is setting up a Telegram bot - it is running in a custom Docker container right next to your Firefly (via Portainer) and you talk to it via a custom Telegram chat channel that you create very easily and quickly. And then you can just tell it "Coffee 5" and it will create a transaction from the (default) cash account in 5€ amount with description "Coffee". This part also works if you are offline at the moment - the bot will receive the message once you get back online. You can use Telegram bot menu system to edit the transaction to add categories or expense accounts, but this part only work if you are online. And the Firefly instance does not have to be online at all. Really nifty.

So next week I will need to write up all the regular payments as bills in Firefly (again) and then I can start writing a Python script to predict my (financial) future!

Figuring out finances part 2

A week ago I started to migrate my financial planning from a closed source system to a new system based on an open source, self-hosted solution. Main candidate is Firefly III - a relatively simple financial planner with a rather rich feature set and a solid user base and developer support.

Starting it up with a Docker-Compose file was quite easy, following the official documentation. The same Compose file also managed the MySQL database, the importer app and a cron container for regular imports. The separate importer app allows both imports from CSV files and also from external bank account connection services. For whatever weird reason both of those services support exporting data from my regular bank accounts, but not from my credit cards for exactly the same bank. So for those cards I would need to periodically download CVS transaction exports and feed them into the importer.

The combination of the cron container and the importer app allows for both of these functions. To do this you first do the import via the Web UI first and configure all the mappings - configure file and date formats, map account names in the bank output to account names that you added in Firefly, configure what otehr columns mean and what is the mapping of other values, like expense and income accounts. At the end of the process you can download a json file representing all the settings of the import you just did. Putting such a json config file in the input folder of the cron container and telling it to do an import (weekly, for example) would do such import periodically. Putting a credit card CSV file along with a config file for credit card import would also auto-import that.

So far so good. However, when I tried importing exports from MoneyWiz or even when I tried re-creating account history directly from the bank data, I hit a very annoying problem. Transfers. Thing is detecting transfers between the real (asset) accounts that you are managing is really essential. For one those are not real expenses and incomes, so failing to mark them as transfers would show weird income/expense numbers. But if you do detect them as transfers and correctly map the destination account, but fail to match the transations between another you get a double-transaction. This becomes really hard when transactions happen on different dates and have different descriptions. So you get both a +1000€ transaction "Credit card reset" on 14.09.2023 in the credit card account and a -1000$ transaction "Repayment of own credit card" on 24.09.2023 in the main account of the bank. Matching them to recognise that it is just one transfer and not two is ... non-trivial. The best solution I could come up with so far is to always map the "Opposing account name" for such transfers to a virtual "Transfers" asset account. That has the benefit of being actually able to correctly represent transfers that take several days to move between accounts and showing you how much money is still in transit at any point in time.

So after I figured this out, finally the account balances started matching up with reality.

Setting up spending categories required another change - the author of the Firefly III does not like complexity so it does not support nesting categories. Categories can only be in a single, flat list. It is suggested that if you do need to track multiple categories and also their combination, then category groups might help you. I will survive for now by simplifying the categories that I do actually use. Might actually make the reports more usable.

A new feature for me will be the ability to use automation rules to assign transactions to categories based on their contents, like expense accounts of keywords in descriptions.

Setting up regular bills (with matching rules to assign incoming transactions to those bills) is another feature that is very important to me. The feature itself works just fine in Firefly III, but it has two restrictions that the author of the software does not actually want to be changed. For one it can not be used to track prodictable incomes (like salary), presumably because it is only there for bills (subscriptions in v3 UI). And for other, there is nothing in the base software that actually uses the data from bills to look forward. The author does not like to try to predict the future. Which for me is basically the one of two reasons to use this kind of software at all. I want to know - given all manually entered regular and 100% predictable expenses and incomes, what will be the state of my accounts at particular date? It seems that to get at that I will need to write my own oracle script using the rich Firefly III API.

The last question I had for this week was - how will I enter a new cash puchace of potatoes on a farmers market into the system that sits in a private server in my home network? Turns out there are actually multiple Android apps for Firefly III that can be easily used for this using a robust OAuth or shared token authentification. Except the web UI needs to be exposed online for this to work (and ideally protected by HTTPS). Other users have also created Telegram bots that allow using chat messages to create transaction entries. This is a bit harder to use and more narrow scope, but should be easier to setup. Will have to try both apporaches.

But before I really get going on this, I need to fix another thing that I have been postponing for a while: I will need to migrate my Home Assistant installation from a Docker container installation to a Home Assistant OS installation so that I can install Addons, including Firefly III, MySQL and Portainer to have a bit more organised and less hand-knitted home server setup. Let's see how that goes next week :D